Posts

ESP32 DHT22 Temperature Humidity to MySQL Database

Image
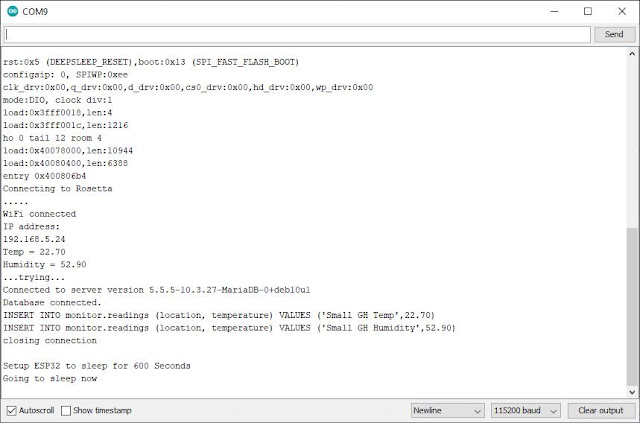
 ESP32 DHT22 Temperature Humidity to MySQL Database  I have decided to replace the Arduino Nano, DHT22 and HC-05 Module with something more simple, smaller, cheaper and with longer battery life. The main focus of this project is the code, for a simple power supply a power bank should last a week or more. The power usage will be 3mA for 99% of the time and only rising to ~140mA for a few seconds per reading. The following were used : ESP32 Devkit C DHT22, temperature humidity sensor MySQL database on local network eg. Raspberry Pi with MariaDB, phpMyAdmin is usefull as well. USB Powerbank Breadboard, wires etc. To connect the DHT22, connect + to 3.3v, Out to pin 14, Gnd to Gnd. Simple :) The complete code is below with extra comments shown in bold. Parts that you need to change are shown in red.  The code can be downloaded from gitlab https://gitlab.com/leahC123/ESP32DHT22MYSQL/-/blob/master/ESP32DHT22.ino ------------------------------------------------------------------...
ESP 32 Devkit C Power usage and reduction

Image
ESP32 Real world power use.  The specification for the ESP32 WROOM that is included on the ESP32 DevkitC are : Worst case scenario Active WiFi 802.11b WiFi TX 345mA 802.11n WiFi TX 280mA RX mode are all around 83mA For the processor: @160 MHz 20mA @80 MHz 15mA To measure real world power usage I am using a USB power meter from Amazon. Ruideng shows on the screen when it first loads and it seems accurate enough for this test. When programming via USB ~ 300mA Plugging in an ESP32 Devkit C with the default code shows 125mA. TimerWakeUp / Deep Sleep sketch in Arduino IDE 10mA This is with a serial connection open ! Without serial connection open from PC the power consumption drops to ~3mA I only realised this by chance and a lot of online sources state ~10mA BLE server example sketch 56 - 57mA BLE Beacon Scanner example sketch 125mA Taking these readings into account it seems that 3mA while in deep sleep is as good as the ESP32 DevkitC is going to get. It is also significantly lower th...

Calibrate 3D Printer

Image
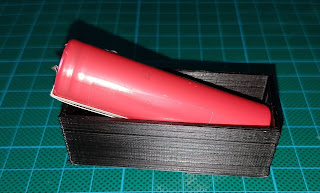
Steps to Calibrate 3D Printer I have a very cheap Geetech I3 Pro B, it cost around £80 delivered in the UK. The slider bars are hollow, linear bearings are nylon, the frame is plywood and the heated plate is wonky but it is capable of some nice prints (after some modification, I will post about this when I have done a few more parts). It is however printing items smaller than they should be. I noticed this when printing a case to hold a 18650 battery and some circuit boards, they would not fit :/ Before attempting callibration please ensure that all belts are taught and nuts bolts and connections are secure. Pay special attention to your bed as mine had a lot of slack where it attached to the belt causing serious issues / circles and curves being uneven, dimensions being short on that axis being the most obvious issue.  This can be resolved by calibrating the printer stepper motors but we may as well calibrate all of them to get the best prints possible. I will do it in the follow...

Exchange 2013 Event ID:15021, OWA blank screen

Image
 This is an annoying issue that seems to occur when the SSL certificate is renewed using ECP. Everything appears to be working fine until the server is restarted...  Under Windows Logs - System there are hundreds of Event ID: 15021 logged with source HttpEvent. Outlook Web Access shows the login page normally but once logged in a blank page is displayed, sometimes with HTTP error 503. Outlook connections and mobile also fail. The first thing to do is open an elevated cmd prompt and run netsh http show sslcert   At the bottom of the output you should see IP:port 127.0.0.1:443 Copy the Certificate Hash and Application ID into a text document as we will need them in a subsequent step. In the elevated cmd prompt run: netsh http delete sslcert ipport=0.0.0.0:444 Next we need to create the command as below substituting the Certificate Hash and Application ID that were previously saved. netsh http add sslcert ipport=0.0.0.0:444 certhash=CertificateHash appid=ApplicationID If thi...

Arduino DHT22 readings over serial

Image
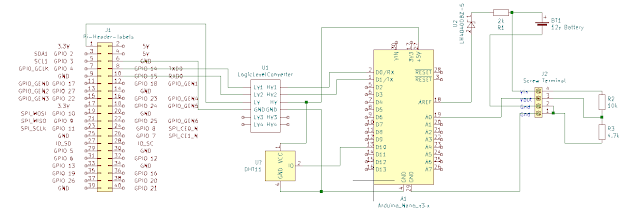
 Today I am going to add a DHT22 temperature humidity sensor to my existing battery voltage monitor project. Uploading and testing the code is done over USB cable, the HC-05 needs to be disconnected for this to work. The DHT22 is connected to +5v, gnd and Digital Pin 10, I only chose pin10 as it is convenient for my veroboard layout. The code for this is very simple : <code> #include "DHT.h" #define DHTPIN 2 // The pin that your DHT is connected to DHT dht(DHTPIN, DHT22); void setup() { dht.begin(); } void loop(){ float h = dht.readHumidity();     //stores humidity value in float variable h float t = dht.readTemperature();// temperature value } </code> Don't forget to import the "DHT sensor library" in library manager in the Arduino IDE.  We can then do whatever we need to with the values. I am going to send request them over serial via a HC-05 Bluetooth device from a Python script on a Raspberry Pi.  For testing  am using a laptop running ...

Laptop to Arduino Nano with HC-05 Bluetooth Module

Image
 After getting a serial connection to work between an Arduino Nano and Pi Zero in a previous project I purchased a HC-05 Bluetooth module so that the Pi can be removed from the enclosure, this should reduce the power requirement significantly resulting in increased battery life. Power requirements : Pi Zero, Arduino Nano 290mA Arduino Nano, HC-05 module Bluetooth Module 50mA The power reduction is huge but it is a bid of a mess when soldered onto veroboard. (I have ordered a few ESP32 for a future improved version.) The wiring diagram is very similar, just replace the Pi Zero with the HC-05 as below. You can ignore everything to the right of the Nano, it is not required for Bluetooth but i am using it to retrieve a battery level reading. When powered up the led on the HC-05 should flash rapidly indicating ready to connect. To test you can use the Android app "Serial Bluetooth Terminal". The default pairing code is "1234". I will be using Python to communicate with t...

Calculating Battery for Small Solar Project

Image
 Today is about planning the power side of a Raspberry Pi Zero W and Arduino Nano (Elegoo clone) greenhouse monitor. We need to calculate the battery and solar panel size so that it can run continually in the UK at least over the summer months. I have measured these figures to give us somewhere to start the calculations : Pi Zero W power draw low 90ma, med 118ma, high 193ma Arduino Nano Clone, running 1x ADC and serial 21ma  Full project usage 280ma :o this includes 12 to 5v switching voltage regulator  280ma is more than I was hoping for, maybe I will look in to reducing this by using a better voltage regulator (without an LED display etc). For now this is what I have to work with, lets add a small margin and call total current draw 300ma. We have around 8 hours a day sunlight hitting the panel so the rest of the time it will be running on battery. 24 - 8 = 16 hours absolute minimum battery = 16 * 300 = 4800mah = 4.8Ah  The cost of a 5Ah lead acid battery from RS Co...